This is the little kitchen I made for the stop motion
Saturday, 22 December 2012
Christmas holiday project!
First of all I would like to wish everyone a Merry Christmas. :) During the holidays I didn't just want to sit around and do nothing as my assessments are held a day after we get back from our break. Apart from still working on my contextual notebook I am also trying to do a stop motion related to my project. I will have two sets. One which will be a kitchen and the other a garden. I just finished the kitchen and my schedule got a bit delayed because...I broke my camera and I just got one today from a friend. There are still many things I have to do for it till I can properly start the stop motion but I am looking forward to the outcome. Even if it wont be great I will still have the documentation of the work I did.
Tuesday, 11 December 2012
My Studio Wall
Hello once again Semester one is nearly over and the Christmas holidays will start next week. :) I cant wait :) I'm so excited. :) Anyway, I am now working on my final piece which will be a stop motion. For now I am designing a mini garden and kitchen for the it.
Here is a picture of how my studio wall looks at the moment :
On my wall are some Spray paints and Monoprints.
Here is a picture of how my studio wall looks at the moment :
On my wall are some Spray paints and Monoprints.
Wednesday, 5 December 2012
Colour layers of monoprint
I did these two monoprints on Tuesday in which I tried to layer two colours over each other to see what would happen. I noticed using the darker colour first is more effective than using the lighter colour first.
Personally I prefer the pink and yellow one.
Spray painting Stencils
Today I wanted to experiment using spray paint, as I have never used it before. I quite enjoyed it :P it's a bit smelly though. First I made three stencils based from the picture of the shell and I made two stencils based of a photograph of a close-up of a hat.
Here are the stencil after they have been used:
:) And here are the pieces I made using those stencils:
The first two were made on cardboard.
Thursday, 29 November 2012
More from my sketchbook
I finally managed to get the two photographs of which I am basing the current sketchbook of.
This is a close-up I took of a hat.
This is a close-up I took of a shell. One is man-made and one is organic and bothe can be found around my house.
Here are a few abstract things that will later go into my sketchbook ( I am mostly focusing on the basic lines these photographs have) :
This was made out of wire
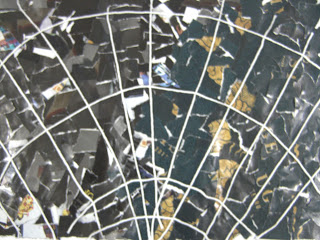
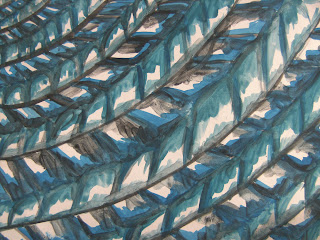
Watercolour on paper
Watercolour and acrylic paint on a layer of foam
Cut out Wallpapers
Newspapers and black watercolour
These are just a few of the most recent things that will go into my sketchbook in which I am mostly just experimenting with different media.
Casting Plaster using Clay
Yesterday for the first time ever I used Plaster as part of my project. It is easy to use and all you need is the plaster, which is like powder and looks like flour, and water. Then all you have to do is mix it until it is like yoghurt. But if you need to pour it into something it can be a bit more watery. My work is still based on photographs.
First I made a thick base out of clay. I then scratched out the lines which will later be the ones to rise when casting with plaster. I basically had to create a negative first so that the finished piece will be right. After finishing the design on the clay base I then made walls around it using the same materials. I made sure to smudge the clay so there wont be any holes for the plaster to go through once it is watery. It is better to leave the clay damp and not too dry. Tis will make it easier to peel it apart from the clay later on.
Once the clay cast is done it is time to get the plaster ready. I just mixed the water and clay until I thought it was ready to pour into the casts then I let it set for around an hour. After that the plaster was ready to be seperated from the clay. Luckily the negatives of the clay survived too.
These are the results from the plastering :
Monday, 26 November 2012
Trying out Monoprints and my new sketchbook
Two weeks ago I made a few black and white Monoprints during the Print Workshop. I based all the things I did on two Photographs which I took. One is a close-up of a hat an the other a shell. One is man-made and the other one is organic. Hopefully I will be able to put up the photographs in my next post as I will be basing my new sketchbook on these.
These are the Monoprints I created during the printing workshop. I did each of them in slightly different ways:
This was made using magazines and wool thread which was glued together using PVA glue.
Watercolours
Barbeque sticks and wool thread was used and glued together with PVA glue
Wire was used in this
These are the Monoprints I created during the printing workshop. I did each of them in slightly different ways:
The following pictures are part of my new sketchbook but the monoprints will also go into that sketchbook.
This was made using magazines and wool thread which was glued together using PVA glue.
Watercolours
Barbeque sticks and wool thread was used and glued together with PVA glue
Wire was used in this
Watercolours
Abstract 3D work based on photographs
This was created using paper straws and binding them together using cable ties. They were then glued together with the glue-gun creates the shape seen in the top picture. I spraypainted them blue as there is a blue background in the photograph.
This is a close-up of it
I also did the same thing in this picture but I left it white to make it look more like the washing-up brush in the photograh of which it was based of.
This was made out of paper mache around a blown-balloon. Around four layers of paper are enough. I then left it to dry for two days and then popped the balloon. I made the glue myself, out of flour and water. This is a much cheaper method than buying glue and it is also more environmently friendly. The photograph of which it is based of is a close-up picture of a plant. I made the spikes using barbeque sticks which I sticked into the form. I used the glue-gun in some places to secure the sticks and makes sure they wont fall out. I used watercolour to colour the sticks. The only difference between the two is that in the top picture I used coloured paper and in the other one I didn't.
Subscribe to:
Comments (Atom)


